
How to Create and Manage Email Accounts
Creating email accounts through cPanel at Vivint Host is straightforward and takes only a few minutes. Follow the instructions below to get started.
1. Log in to Your cPanel and Go to the Email Section
Once you're logged into your cPanel, locate the "Email Accounts" option under the Mail section.
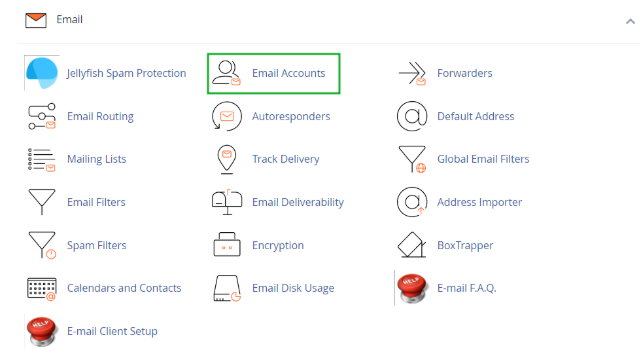
Note: If you're managing your hosting through Vivint Host’s client dashboard, you can use the cPanel shortcut for quicker access.
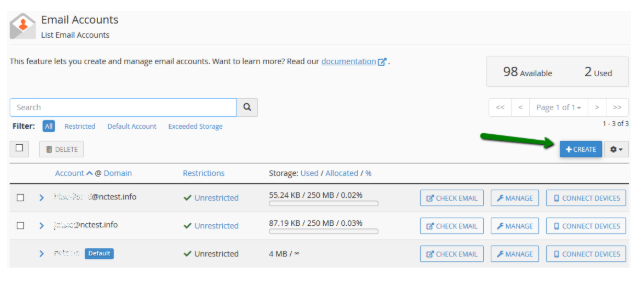
2. Click the "+Create" Button
Inside the Email Accounts page, click on the "+Create" button to begin setting up a new email address.
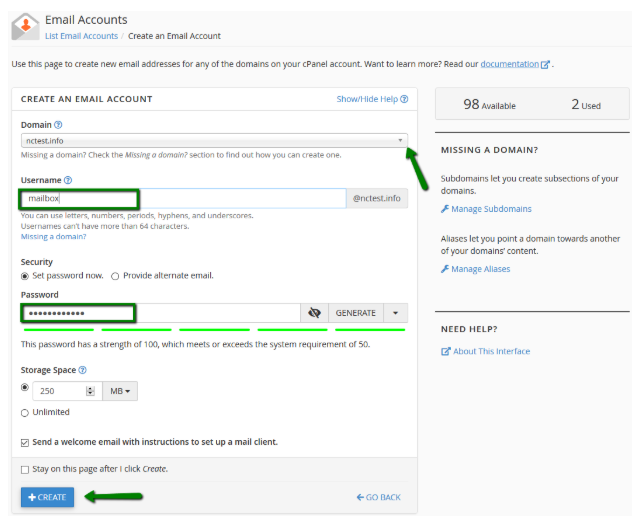
3. Select the Domain and Enter Your Email Details
If your account is linked to multiple domains, choose the correct one from the dropdown in the top-right corner.
Next, fill in your preferred email username (e.g., support@yourdomain.com).
Set Your Password:
Enter a strong password manually, or Provide an alternate email address to receive a setup link.
The setup link allows you (or your team) to configure the password securely and will also be used for account notifications and password recovery.
After completing all required fields, click “+Create” to finish.
4. Access Your Webmail
Once the account is created, go back to the Email Accounts list. Click on “Check Email” next to the account to access your inbox.

Direct Webmail Access
You can also access webmail straight from your browser using any of the following:
- https://yourdomain.com:2096
- https://yourdomain.com/webmail
- http://webmail.yourdomain.com
Use your full email address and password to log in.
Need Help?
If you have any trouble or questions, Vivint Host’s support team is available 24/7. We’re always here to assist you—whether you’re just starting or managing multiple accounts.
Would you like me to rewrite the next article too? Just drop it here—I’ll make sure it meets the same standard.