
How to Manually Transfer a Website to Vivint Host Using cPanel
Migrating your website to Vivint Host doesn’t have to be complicated. If you’re moving from another host and prefer a manual approach (instead of using automated plugins), this guide will walk you through the entire process-step by step.
Step 1: Locate Your Website Files in the Old cPanel
Before moving your site, you need to access its files from your previous hosting provider.
- Log in to your old cPanel account.
- Under the "Files" section, click "File Manager".
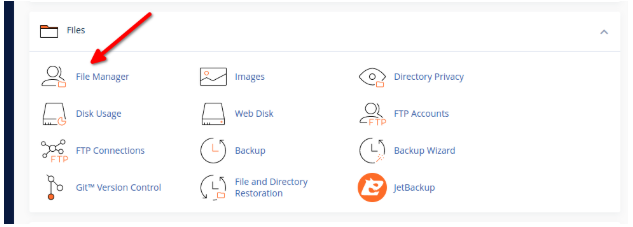
- You’ll be prompted to select a directory. If you know your website’s folder (often inside public_html), select it. Otherwise, start from the root directory.
- Navigate to public_html (or equivalent) and find the folder containing your website files.
For example, if your site is a WordPress installation, it might be in public_html/blog or directly inside public_html.

Step 2: Compress and Download Your Website Files
Downloading files individually is inefficient. Instead, compress them into a single ZIP file:
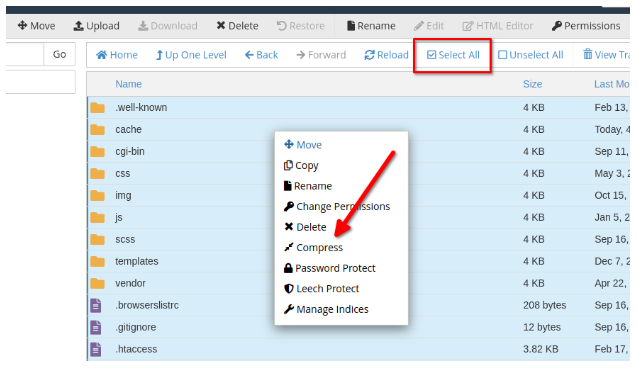
- Inside your website’s folder, click "Select All" (top checkbox).
- Right-click any file, choose "Compress", then select ZIP as the format.
- Click "Compress File(s)" and wait for the process to complete.
- Once done, locate the new ZIP file, right-click it, and select "Download" to save it to your computer.
This ensures all your site files are bundled neatly for easy transfer.
Step 3: Set Up Your New Website Folder in Vivint Host’s cPanel
Now, let’s prepare the destination on Vivint Host:
- Log in to your Vivint Host cPanel.
- Open "File Manager" again and go to public_html.
Click "+Folder" to create a new directory (e.g., yourwebsite.com).
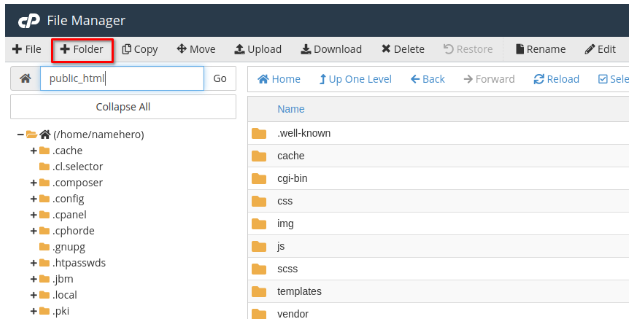
Ensure it’s inside public_html—otherwise, your site won’t be publicly accessible.
Step 4: Upload and Extract Your Website Files
With the new folder ready:
- Open it and click "Upload" at the top.
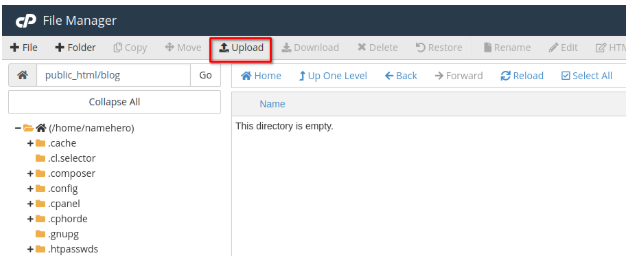
- Select the ZIP file you downloaded earlier.
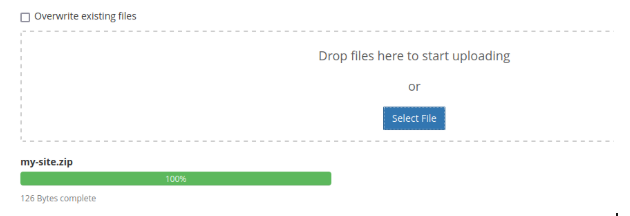
- Once uploaded, refresh the File Manager (click "Reload").
Right-click the ZIP file and choose "Extract".
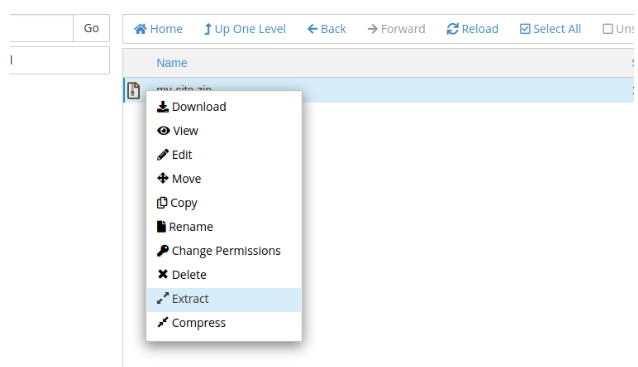
- Confirm the extraction location (your new folder).
After extraction, all your website files will be in place.
How To Upload Your Database
Your website’s content (posts, settings, plugins) is stored in a database. Here’s how to move it:
Step 1: Identify Your Current Database Name
If you’re using WordPress:
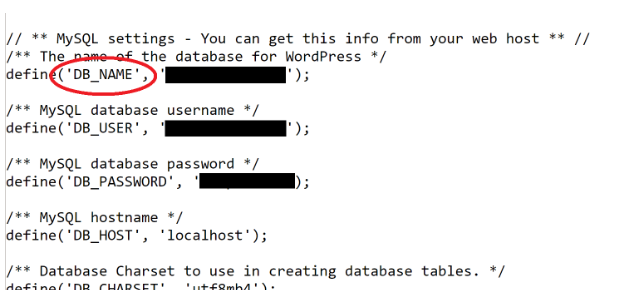
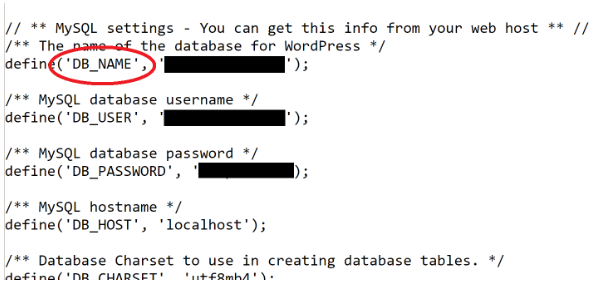
- In your old hosting’s File Manager, locate wp-config.php.
- Open it and find the line:
- define('DB_NAME', 'your_database_name');
This is your database name.
Step 2: Export the Database via phpMyAdmin
- In your old cPanel, find and open phpMyAdmin.
- Click the "Export" tab.
- Leave settings as default and click "Go" to download the .sql file.
Step 3: Create a New Database in Vivint Host’s cPanel
- Log in to Vivint Host cPanel.
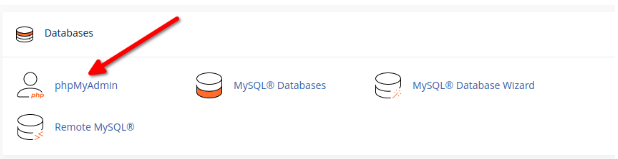
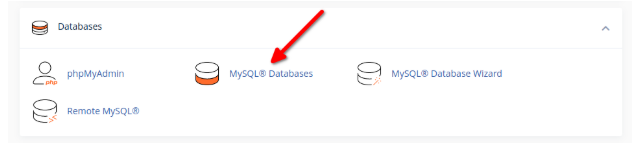
- Go to "MySQL Databases".
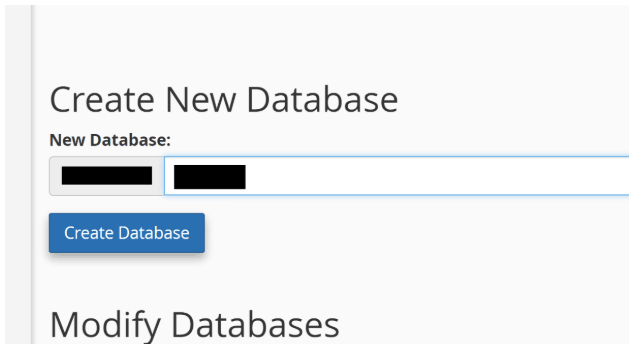
- Under "Create New Database", enter a name (e.g., vivint_db) and click "Create Database".
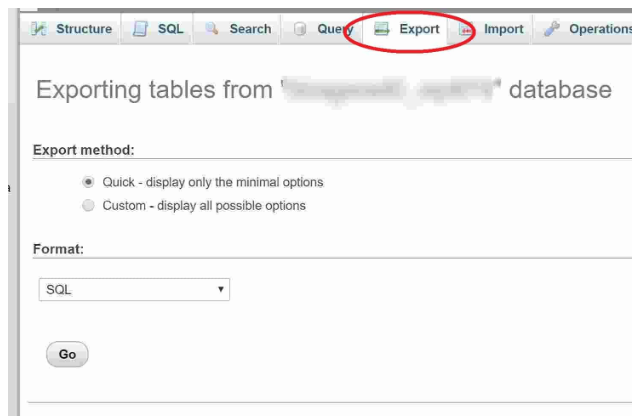
The default settings are sufficient. Simply click the 'Go' button at the bottom. This will start downloading your database to your desktop as a text file. The download time will vary based on the size of your database - for instance, a medium-sized database might be around 30 MB and could take a few minutes.
Step 4: Creating the New Database on Vivint Host
Before importing our data, we first need to explicitly create a new database on cPanel. The reason is that we might not have permissions to create a new one directly within phpMyAdmin.
So first log into Vivint Host cPanel and click "MySQL Databases" as shown here:
This will bring up the database creation dialogue box right at the top.
Step 4: Import Your Database to Vivint Host
- Open phpMyAdmin in Vivint Host’s cPanel.
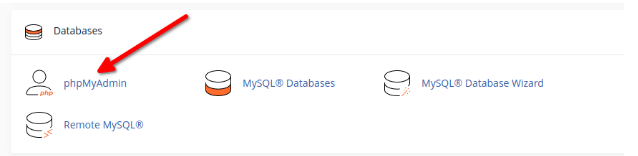
- Select your new database from the left panel.
Click the "Import" tab.
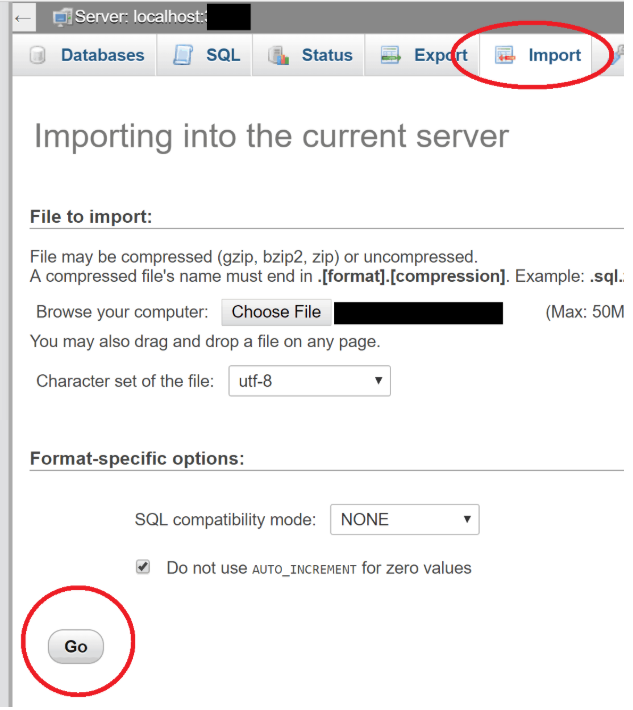
- Upload the .sql file you exported earlier.
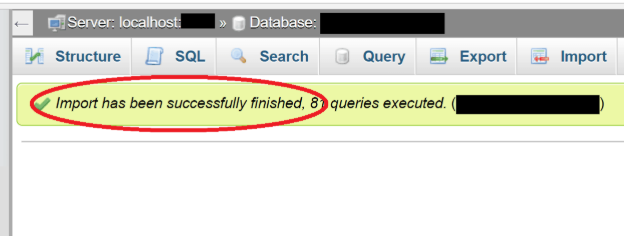
- Click "Go"-once done, you’ll see a success message.
Step 5: Update Your Website’s Database Connection
For WordPress:
- In Vivint Host’s File Manager, open wp-config.php.
- Update the database details to match your new database:
Final Check: Is Your Website Live?
After completing these steps:
- Clear your browser cache.
- Visit your domain to ensure everything loads correctly.
- If you encounter errors, double-check file permissions and database connections.
Need Help? Vivint Host’s Support Team is Here 24/7
If you run into any issues during migration, our experts are ready to assist. Vivint Host ensures fast, secure, and hassle-free hosting-so you can focus on your website, not the technicalities.