
How to Set Up Google Workspace Email with Vivint Host
Many Vivint Host customers choose to use Google Workspace (previously G Suite) for their business email. It's a reliable and easy-to-use platform that works well for teams of all sizes.
This guide will walk you through setting up your domain hosted at Vivint Host to work with Google Workspace email.
Step 1: Sign Up for Google Workspace
To get started, go to the Google Workspace website and sign up for an account. Google offers a 14-day free trial so you can test the service before making a final decision.
We recommend signing up directly through Google for the best control and support options.
Once your Google Workspace account is active, you’ll need to connect it with your domain by updating the email settings in your Vivint Host control panel.
Step 2: Change Email Routing in cPanel
Before changing your domain’s email records, you need to let cPanel know that your emails will be handled outside of Vivint Host.
Follow these steps:
Log in to cPanel for your domain.
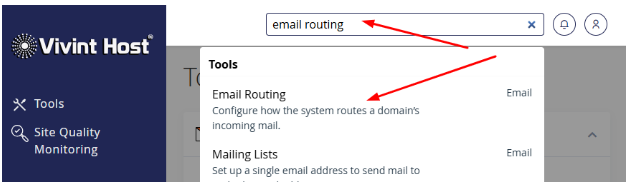
- Go to Email Routing under the "Email" section.
Select Remote Mail Exchanger.
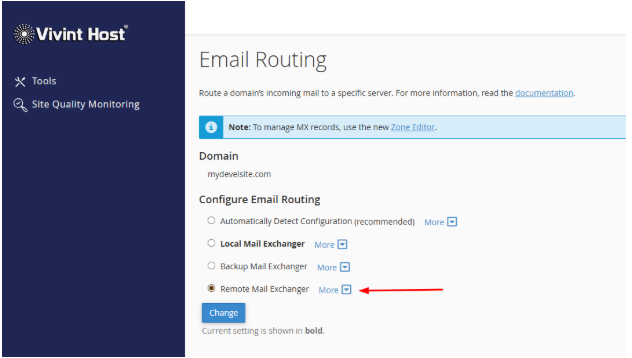
This setting tells your server not to deliver email locally but to send it to Google instead.
Click Change to save the new setting.
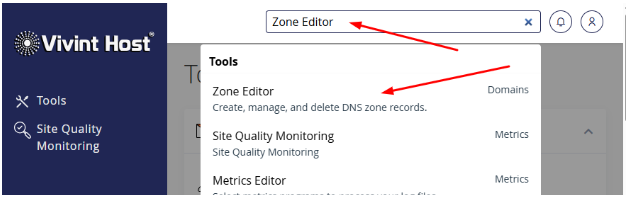
Step 3: Update MX Records to Use Google
Now it's time to update your domain’s mail settings so that all incoming emails go to Google.
Once this is done, email services like mailboxes, forwarders, and auto-responders will be handled through your Google Workspace dashboard.
Here's how:
Go to cPanel > Zone Editor.
Choose your domain and click Manage.
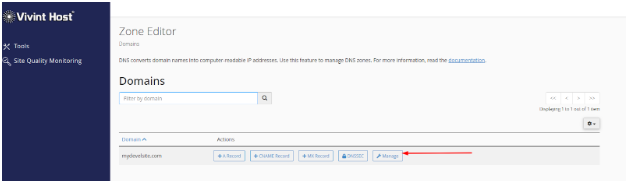
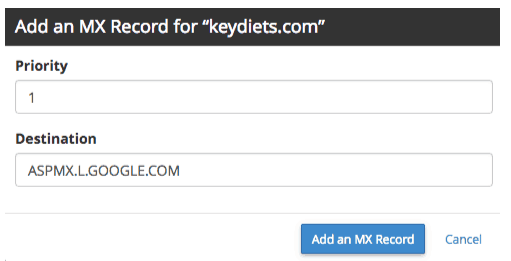
- Click +MX Record to start adding Google’s records.
Add these five entries one by one:
|
Priority |
Mail Server Address |
|
1 |
ASPMX.L.GOOGLE.COM |
|
5 |
ALT1.ASPMX.L.GOOGLE.COM |
|
5 |
ALT2.ASPMX.L.GOOGLE.COM |
|
10 |
ALT3.ASPMX.L.GOOGLE.COM |
|
10 |
ALT4.ASPMX.L.GOOGLE.COM |
Do not add a period (.) at the end of each mail server address.
Once all records are added:
- Go back to Manage.
- Filter the list to show only MX records.
- Delete the default MX record (usually with priority 0).
Step 4: Confirm Your DNS Settings
It’s always good to double-check that your DNS settings are correct. You can use a DNS checking tool and review your MX records. If everything looks good, your email is now connected to Google Workspace.
You're All Set
Your domain with Vivint Host is now set up to use Google Workspace for email. If you run into any issues or have questions, our support team is available 24/7 to help.
We’re also working on a video guide to walk you through these steps visually. Stay tuned!