
How to Set Up Vivint Host Email on Outlook (Windows/macOS)
Keeping your email communication running smoothly is essential for any business or professional. At Vivint Host, we make it easy for you to connect your email to Outlook, whether you're using Windows or macOS. Follow this detailed, step-by-step guide to set up your Vivint email account correctly and securely in Microsoft Outlook.
Before You Start: Locate Your Email Configuration Settings
To get started, you'll need your exact email configuration details. Here’s how to find them:
- Log into your cPanel account.
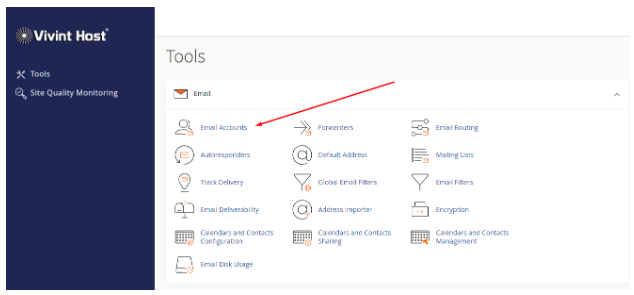
- Under the Email section, click Email Accounts.
- Next to the email address you want to configure, click Connect Devices.
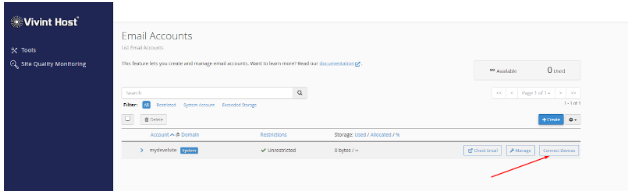
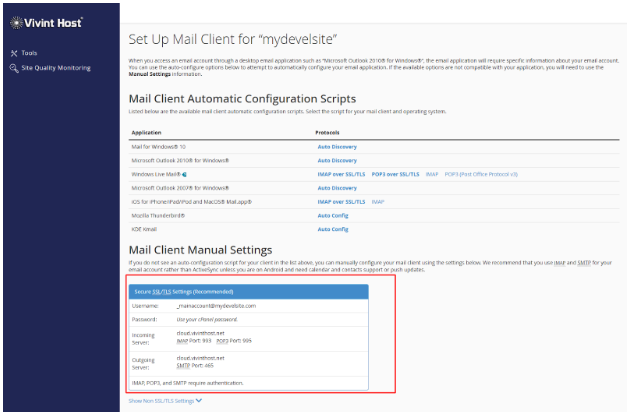
This page will show your incoming and outgoing server settings, port numbers, and security protocols (SSL/TLS).
Important: Make sure you’ve created your email address in cPanel and noted the password before beginning the setup process.
Set Up Vivint Host Email in Outlook
Step 1: Launch Microsoft Outlook
Start by opening Microsoft Outlook on your device.
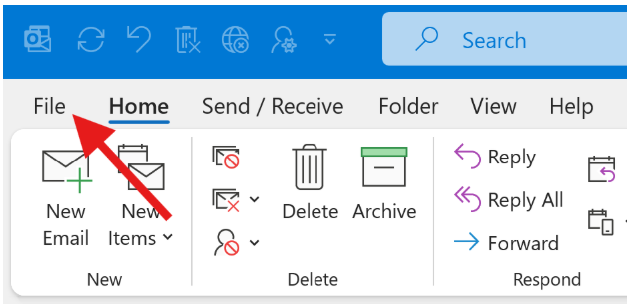
Step 2: Go to the File Tab
In the top menu, click File to open account-related settings.
Step 3: Access Profile Settings
- Click on Account Settings (you’ll see a dropdown arrow).
- From the dropdown, choose Manage Profiles.
- A new window will appear. If prompted by Windows, allow the action.

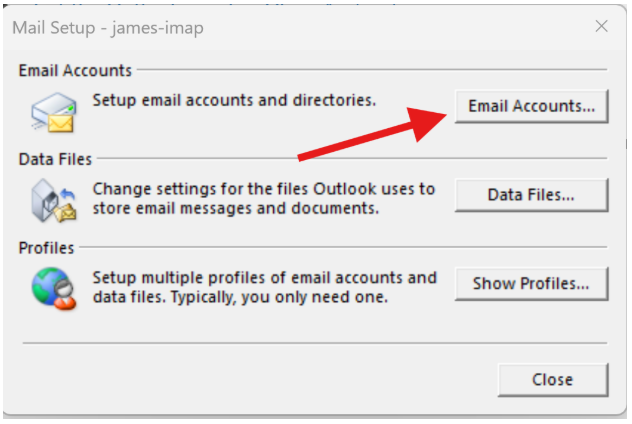
Step 4: Open Email Accounts
In the Profile window, click the Email Accounts button.
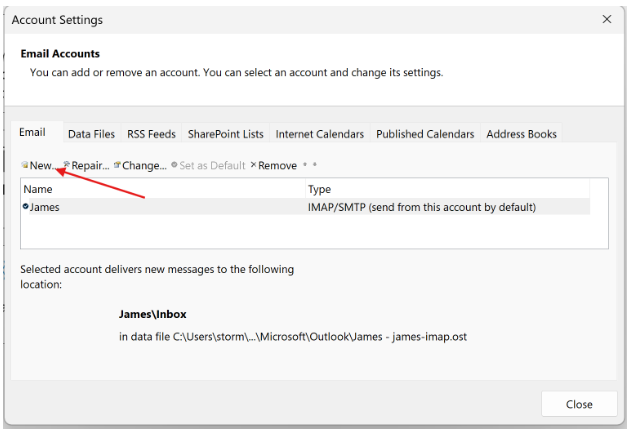
Step 5: Add a New Email Account
Now, click on New to start adding your Vivint Host email.
Step 6: Manual Setup
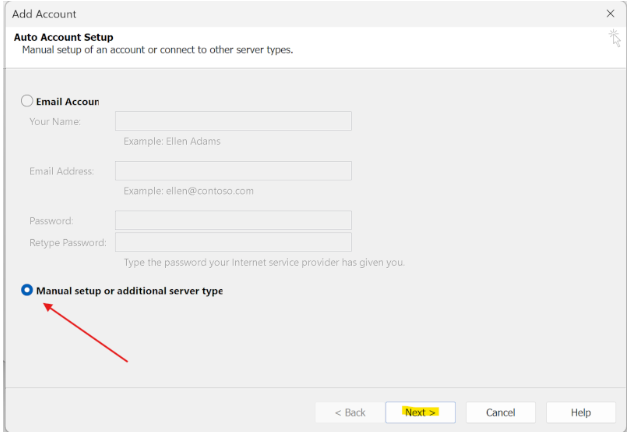
- Choose Manual setup or additional server types.
- Click Next.
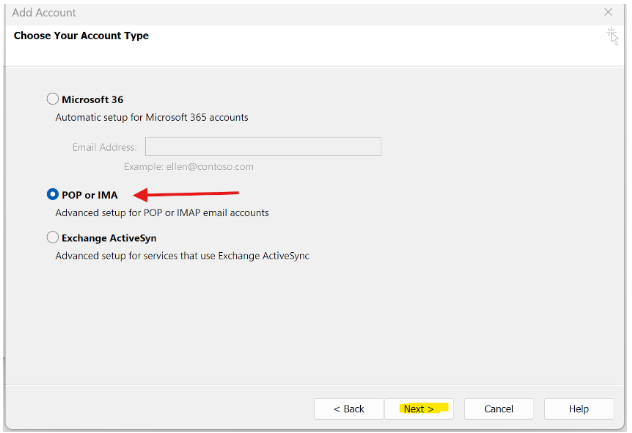
- Select POP or IMAP, then click Next again.
Step 7: Enter Your Account Information
Fill in the required fields:
- Your Name: Enter the name you want recipients to see.
- Email Address: Use your full Vivint Host email.
- Account Type: Choose IMAP (recommended) or POP3.
- Incoming Mail Server: Typically mail.yourdomain.com
- Outgoing Mail Server (SMTP): Typically mail.yourdomain.com
- Username: Your full email address.
- Password: The password you set up in cPanel.
Then click on More Settings before proceeding.
Step 8: Configure Outgoing Server Authentication
- Go to the Outgoing Server tab.
- Check the box that says My outgoing server (SMTP) requires authentication.
- Ensure Use the same settings as my incoming mail server is selected.

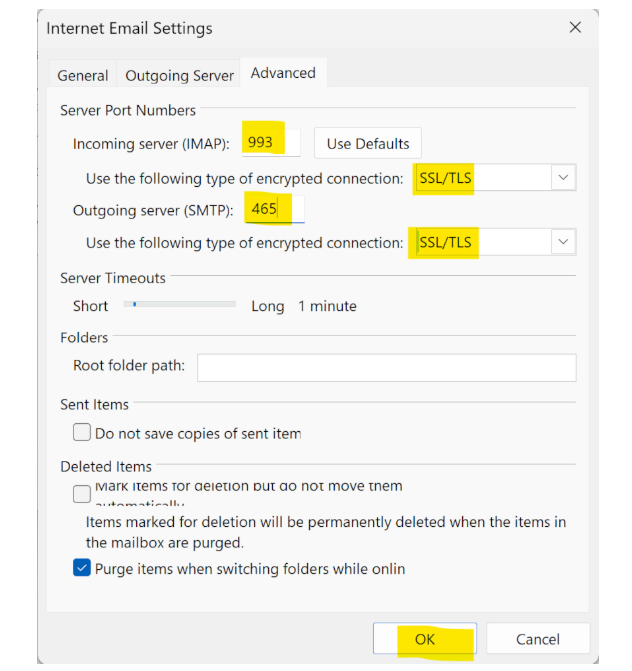
Step 9: Adjust Port Numbers and Encryption
Head to the Advanced tab:
- Incoming Server (IMAP): Port 993 with SSL/TLS
- Outgoing Server (SMTP): Port 465 or 587 with SSL/TLS
Make sure these settings match what was shown in your cPanel under Connect Devices.
Click OK to save.
Step 10: Finalize the Setup
- Click Next.
- Outlook will now perform a Test Account Settings check to verify your credentials.
- If everything is correct, you’ll see confirmation messages for sending and receiving.
- Click Close, then Finish.
That’s it! You’ve successfully set up your Vivint Host email in Microsoft Outlook. Your inbox is now fully connected and secured with SSL encryption, ready to send and receive messages confidently.