

How to Install a Free Lifetime SSL Certificate on Your Website
At Vivint Host, every Web Hosting, Reseller Hosting, and Cloud VPS plan comes with a free SSL certificate, automatically installed for all domains and subdomains. That means your website will use secure HTTPS connections by default-protecting your visitors and helping your site perform better in search engines.
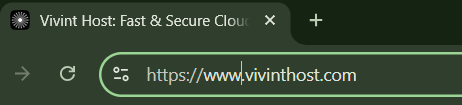
A valid SSL certificate encrypts all data transferred between your site and your visitors. Without one, modern browsers like Chrome will flag your site as "Not Secure," damaging trust and potentially harming your SEO rankings.
Below is a step-by-step guide to ensure your free SSL is properly installed and functioning.
Step 1: Point Your Domain to the Correct Nameservers
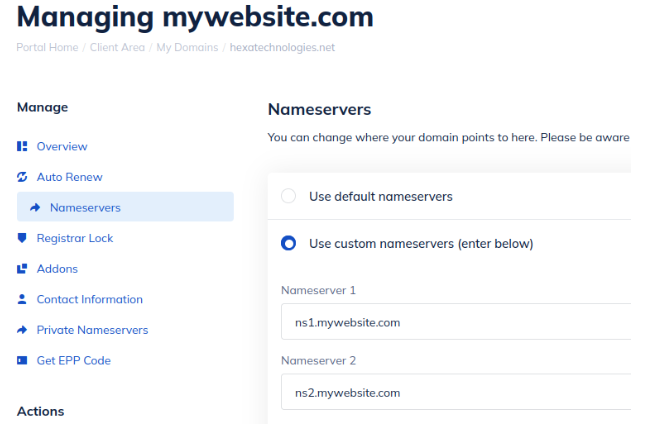
When you sign up for a Vivint Host account, your welcome email includes a unique set of nameservers. These are necessary to link your domain to your hosting plan.
- If you registered your domain directly with Vivint Host, nameservers are set automatically.
- If you’re using a domain from another registrar (like GoDaddy), you need to manually update the nameservers.
To find your nameservers:
- Log into the Vivint Host Client Area.
- Navigate to your hosting service, where your assigned nameservers are displayed.
If your domain is registered elsewhere:
- Log into your domain registrar’s control panel.
- Update the domain’s nameservers to the ones provided in your Vivint Host account.
Note: It can take up to 24 hours for DNS changes to fully propagate.
If you're managing your DNS through a third-party service like Cloudflare, and using their nameservers, AutoSSL might not work automatically.
Step 2: Check Your SSL Certificate in cPanel
Once your nameservers are pointing correctly, AutoSSL will automatically validate your domain and install your SSL certificate. You can check the status of your SSL certificate by doing the following:
- Log into cPanel.
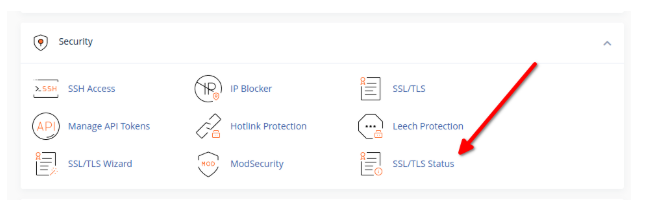
- Click on SSL/TLS Status under the Security section.
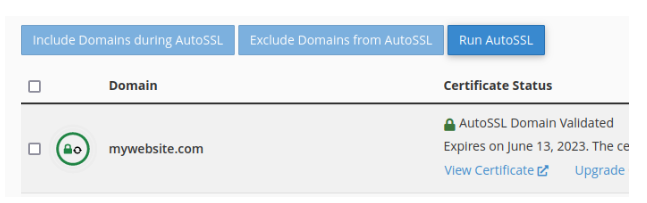
You should see a green lock icon next to each of your domains/subdomains, indicating a valid SSL certificate is in place.
If you don’t see the green lock:
- Select the checkbox next to your domain(s).
- Click on "Run AutoSSL" to manually trigger the installation.
The process might take a few minutes, so keep the window open while it completes.
Step 3: Configure Your Website to Use HTTPS
With your SSL certificate installed, the next step is to ensure your website only uses HTTPS. Otherwise, you might still see mixed content warnings or lose the browser lock icon.
For WordPress Users:
- Log into your wp-admin dashboard.
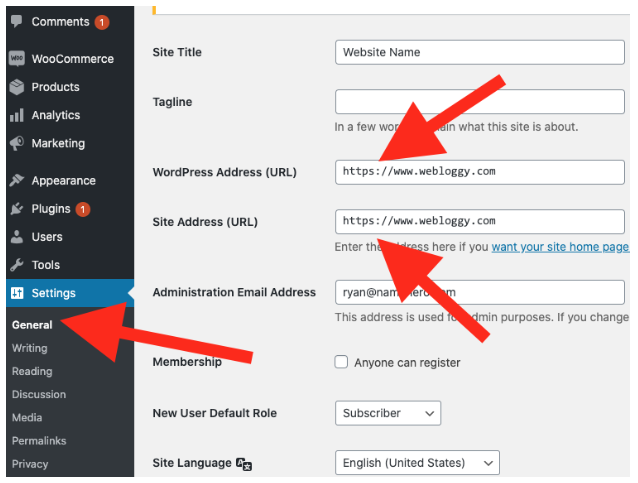
- Go to Settings > General.
- Update both the WordPress Address (URL) and Site Address (URL) to include https://.
To simplify this process, we recommend installing the free Really Simple SSL plugin. It automatically updates your database and settings to make sure everything loads securely.
For manually modify your .htaccess file:
Ensure all your CSS, JavaScript, images, and other assets are being served over https.
To force HTTPS for all traffic, add the following code to your .htaccess file:
RewriteEngine On
RewriteCond %{HTTPS} off
RewriteRule ^(.*)$ https://%{HTTP_HOST}%{REQUEST_URI} [L,R=301]
AutoSSL will automatically renew your certificate as long as your nameservers remain correctly pointed. No manual intervention is needed after the initial setup.
Troubleshooting Common SSL Issues
Here are some common issues you may encounter and how to resolve them:
1. Domain Excluded from AutoSSL
This can happen with older websites or those migrated from another provider. To fix this:
- Go to cPanel > SSL/TLS Status.
- Select the checkbox next to the affected domain.
- Click "Include Domains During AutoSSL" and re-run AutoSSL.
2. Red Lock Icon in cPanel
A red lock often means AutoSSL couldn’t verify your domain. Common causes:
- You’re using third-party DNS (like Cloudflare).
- Your site structure or SEO plugins are altering URLs.
If you're using Cloudflare, switch your domain’s nameservers back to Vivint Host and enable Cloudflare through cPanel > Cloudflare using CNAME setup.
If that’s not possible, you can purchase and install a Wildcard SSL certificate manually.
3. Website Says "Not Secure" Despite Active SSL
If cPanel shows your SSL is active, but your site still appears insecure:
- Some page elements may be loading over http instead of https.
- Use Chrome Dev Tools (Right-click > Inspect > Console tab) to find and fix insecure resources.
For WordPress sites, installing the Really Simple SSL plugin usually resolves these issues.
4. SSL Certificate Not Installed Yet
If your nameservers were recently updated, it may take up to 24 hours to propagate.
- Wait a few hours.
- Try re-running AutoSSL manually from cPanel.
Need Help?
At Vivint Host, we’re here 24/7. If you run into any issues setting up your SSL certificate, reach out to our support team for quick assistance.
Enjoy full SSL protection-free for life-with every hosting package at Vivint Host.