
How to Upload and Set Up a Database in Vivint Host
Setting up your database correctly is a crucial part of launching your website. If you’ve already created a MySQL or MariaDB database and need to import it to Vivint Host, we’ve got you covered. This guide will walk you through the process to ensure everything runs smoothly.
Step 1: Preparation
Before you start uploading your database, ensure that the database file you're working with meets the following criteria:
- File Format: It should be in .sql or .sql.zip format.
- No Database Creation or Deletion Commands: Your file must not contain commands like DROP DATABASE IF EXISTS or CREATE DATABASE IF NOT EXISTS.
- Avoid Privileges that Require SUPER Access: The file should not have any commands that would require SUPER privileges (e.g., GRANT ALL PRIVILEGES).
- No DEFINER, PROCEDURE, or TRIGGER Lines: Make sure the file doesn’t contain lines involving DEFINER, PROCEDURE, or TRIGGER.
If your database requires commands that need SUPER privileges, consider migrating to a VPS plan for more control over these privileges.
Step 2: Create a New Database
Next, you need to create a new database on Vivint Host:
- Go to Your Dashboard: Log into your Vivint Host account and navigate to Websites → Dashboard.
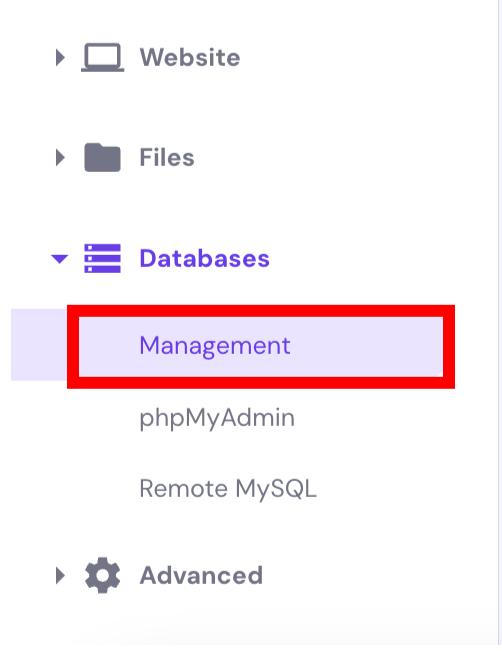
- Database Management: In the left sidebar, look for Databases and select Management.
- Create the Database: Enter the name for your database, choose a username, and set a strong password.
Step 3: Import Your Database Backup
Once your database is set up, the next step is to import your backup file:
- Access phpMyAdmin: Open your newly created database using phpMyAdmin.
- Import Process: Click on the Import tab and browse for the backup file you saved on your computer. Follow the simple steps outlined in our article: How to Import a Database with phpMyAdmin.

Step 4: Update Your Website’s Configuration File
For your website to work seamlessly with the newly imported database, you will need to update the database connection details in your website’s configuration file:
- Locate the Configuration File: The location of this file varies depending on the content management system (CMS) you’re using.
- Update the Database Details: You will need to modify the database name, username, password, and host to match the details of your newly created database.
By following these steps, you can quickly upload and set up your database in Vivint Host with minimal effort. Should you need assistance, our expert support team is available 24/7 to guide you through the process.