
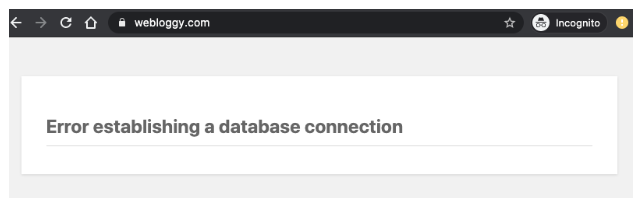
How to Fix the Error Establishing a Database Connection
When running a WordPress website, you may sometimes encounter the message: "Error establishing a database connection." This error occurs when your website can’t connect to the database where all your content, settings, and user data are stored. At Vivint Host, we’ve helped hundreds of users resolve this quickly - here's how you can do the same.
1. Check Vivint Host Network Status
Before diving into file configurations, first confirm that there isn't a temporary network issue on our end.
- Visit the Vivint Host Network Status Page to view real-time updates.
- If there's a known outage, rest assured our team is already working on it.
Downtime at Vivint Host is rare, but we’re fully transparent about any service interruptions.
2. Check Your Website's Configuration File (wp-config.php)
Your WordPress configuration file is the bridge between your site and your database. If something’s incorrect here, your site won’t load properly.
Steps:
- Log into cPanel > File Manager and navigate to the folder where WordPress is installed (usually public_html).
- Open the wp-config.php file.
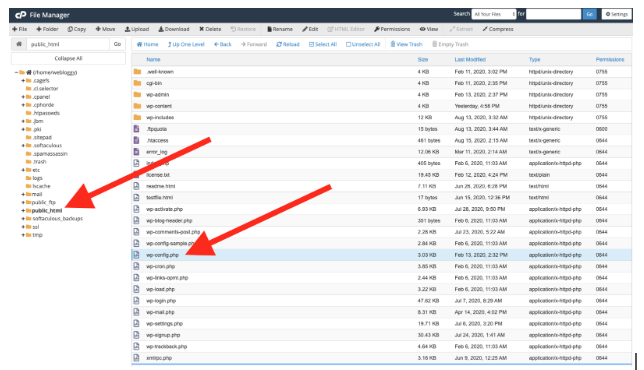
If you're having trouble finding it, try using the search box in the top right corner to search across all your folders.
Once you find it, right-click and choose 'Edit'.
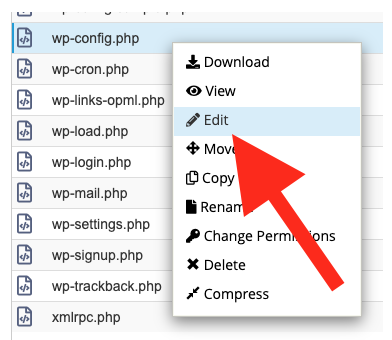
This will open another dialog - simply click 'Edit' to access the file.
Look for the MySQL settings, including the database name, username, and host. They should appear similar to this:
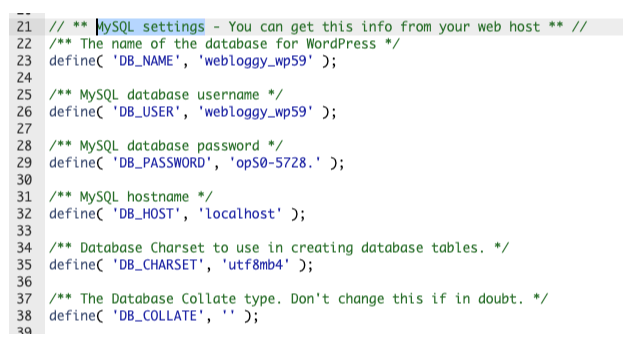
First, confirm that the MySQL hostname is set to 'localhost' as shown above.
If it is, open a new window and return to cPanel, then click on 'MySQL Databases'.
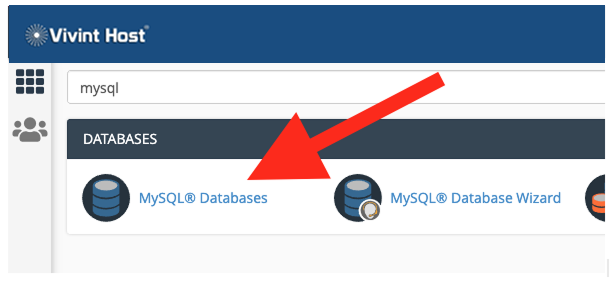
This will take you to a dashboard displaying all your databases.
Check that the database listed next to DB_NAME in your wp-config.php file actually exists.
In the example above, the database name is webloggy_wp59 — so that's the one to look for.
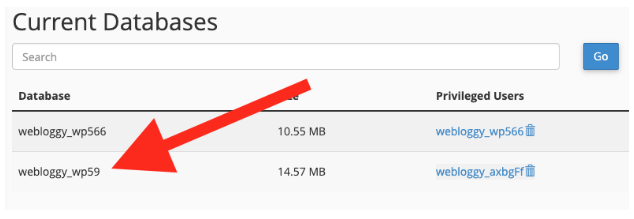
In this case, the database does exist, so I double-check that it's spelled correctly — and it is.
If the name were different, you'd need to update the value next to DB_NAME in your wp-config.php file.
Now that I've confirmed the hostname is set to 'localhost' and the database webloggy_wp59 is correctly listed, the next step is to check the DB_USER.
In my wp-config.php file, it's set to webloggy_wp59.

Next, I need to compare this with the Privileged Users column next to the database in cPanel.
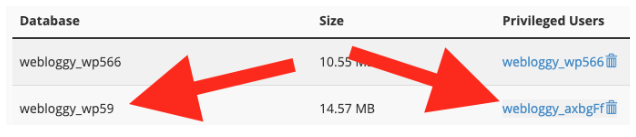
Got it! I’ve found the issue - the database user in my wp-config.php file doesn’t match the one listed in cPanel.
If there were no users under the Privileged User column, I’d scroll down the page to create a new user and assign it to the database.
Now, I’ll go back to my wp-config.php file and update the DB_USER with the correct value, like this:
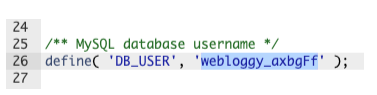
Make sure to place the new value within the quotation marks - don’t delete them.
Since the database username was incorrect, it’s likely the password is wrong too. So, I’ll head back to the MySQL section in cPanel to reset it.
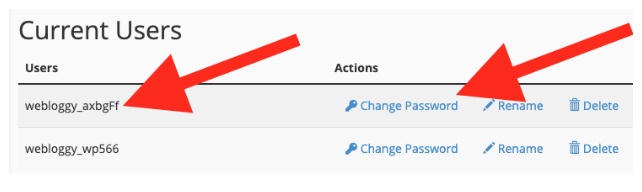
Scrolling down from the list of databases, I’ll find the Current Users section. Next to the correct user, I’ll click Change Password.
This will take me to a page where I can set a new password. While I could enter the existing one from the wp-config.php file under DB_PASSWORD, it's more secure to reset it.
So instead, I’ll use the Password Generator to create a strong, secure password.
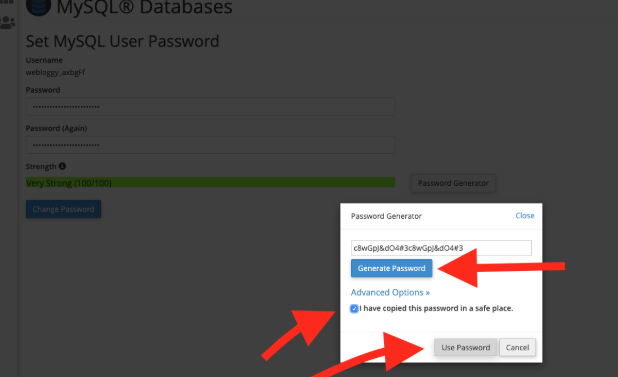
As shown by the red arrows, I first need to generate the password. Before confirming that I’ve copied it, I should switch back to my wp-config.php file and paste the new password there.

Just like with the database name and user, the password must be placed between the quotation marks - deleting them could cause an error.
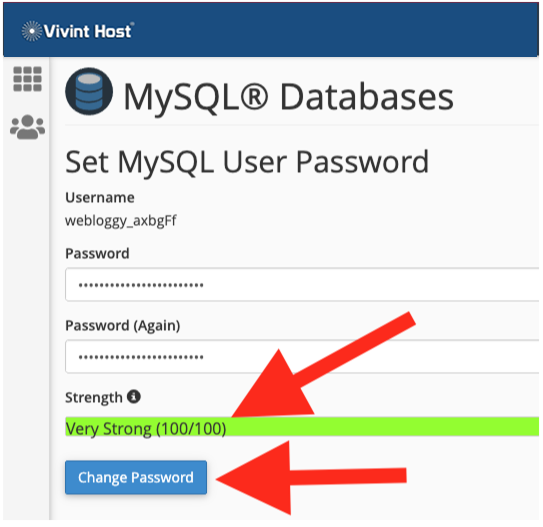
Once that’s done, I can return to cPanel and click Use Password. This brings me back to the password reset screen, where I can officially set the password. I’ll also check that the strength is marked as Very Strong (100/100).
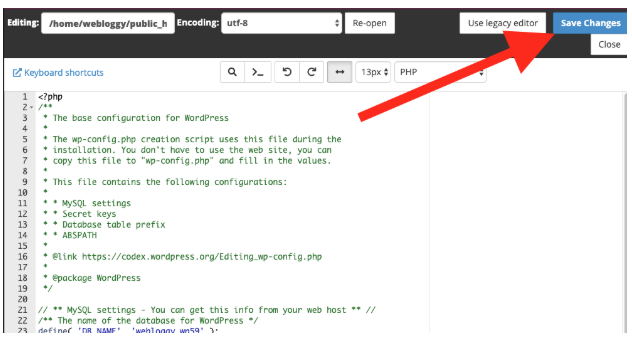
Now, I can return to my wp-config.php file and click Save Changes.
Next, I refresh my website and, thankfully, the dreaded error is gone - my site is back online!
If our Status Page isn’t showing any service degradation and you’re confident your configuration file is set up correctly, it might be tempting to get frustrated - but don’t give up just yet. There’s one more thing we should check.
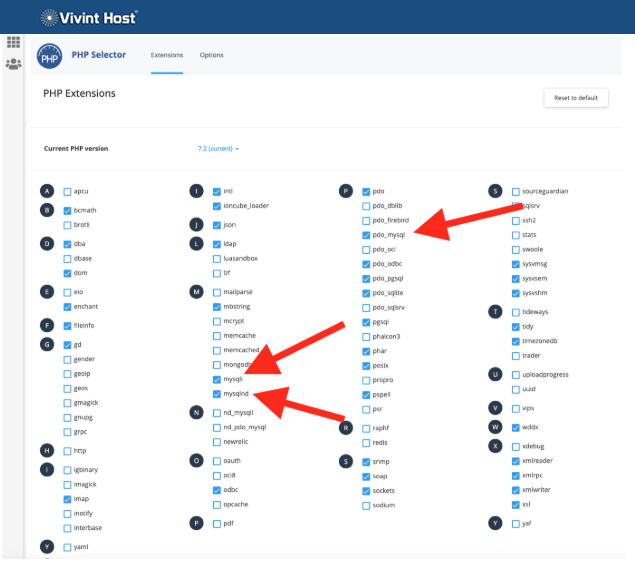
3. Inspect PHP MySQL Extensions
In some cases, especially after a PHP version change or a site migration, the required PHP extensions might be disabled.
How to Check:
- Go to cPanel > Select PHP Version.
- Look for these extensions:
- mysqli
- mysqlnd
- pdo_mysql
If You Still See the Error:
- Try switching PHP versions (e.g., from 7.2 to 7.4).
- Ensure the updated version includes the necessary extensions.
- Some plugins/themes may require specific PHP extensions, so check their documentation.
Common Scenarios That Trigger This Error:
- Migrating from another web host
- Restoring a backup with missing files
- Accidentally modifying or deleting wp-config.php
- Updating PHP without adjusting the relevant extensions
If you’ve followed all the above steps and still face issues, our 24/7 expert support team is ready to assist you further.
We're committed to providing fast, secure, and expert-backed cloud hosting — so your focus stays on growing your business, not fixing errors.