
How to Use FileZilla for SSH/SFTP Connections (Windows)
At Vivint Host, keeping your data secure is part of our commitment to delivering fast, safe, and professional hosting. If you're looking to connect to your hosting account using FileZilla over SSH/SFTP on a Windows machine, this guide will walk you through the entire process-from generating keys to connecting securely.
Step 1: Confirm SSH Access Is Enabled on Your Account
SSH access is disabled by default for security reasons. Before you begin, submit a support ticket from your Vivint Host dashboard and request SSH access to be enabled on your cPanel account.
Once our team confirms SSH is active, you can move on to the next step.
Step 2: Download PuTTYgen
To generate your SSH key pair, you’ll need PuTTYgen. Open your browser and download it from the official PuTTY website.
After downloading, install and open PuTTYgen on your computer.
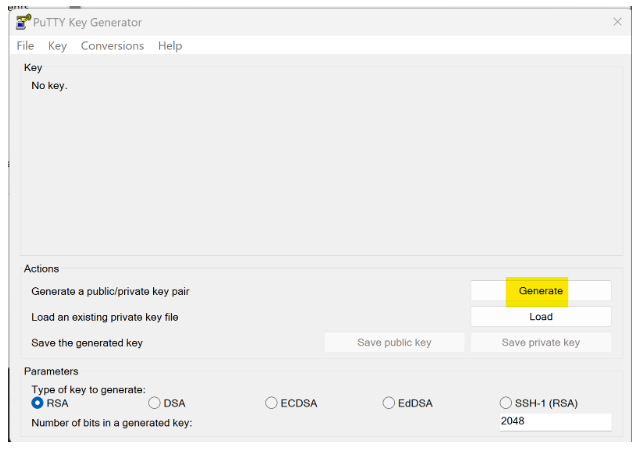
Step 3: Generate Your Key Pair
- Launch PuTTYgen.
- Click the Generate button.
Move your mouse randomly in the blank area until the key is generated.
After the key is ready:
- Add a Key comment to identify this key (e.g., MyLaptop).
- Save both your public and private keys somewhere safe on your PC. You’ll need the private key later when configuring FileZilla (Step 15).
Make sure you remember where you saved them!
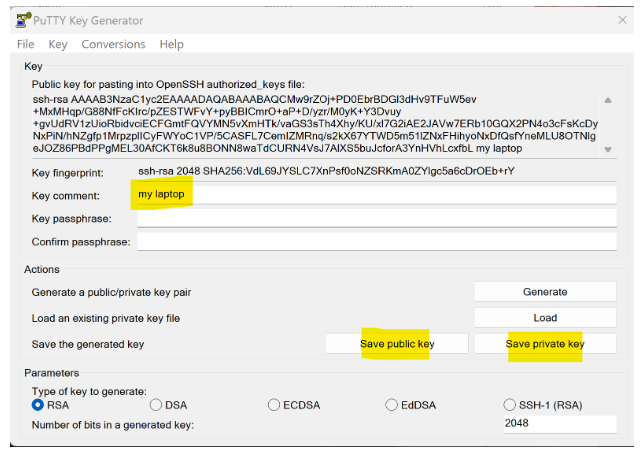
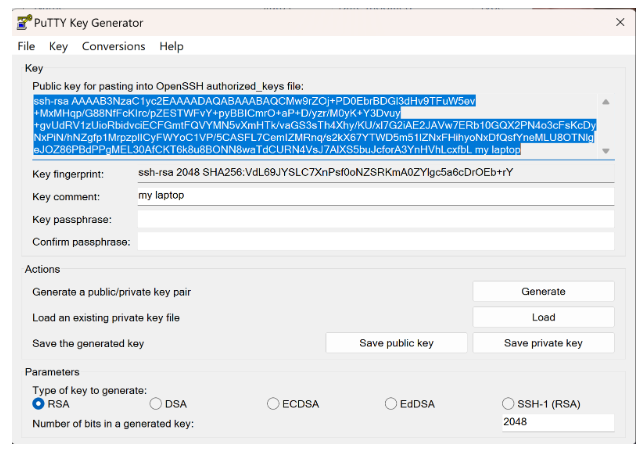
Step 4: Copy the Public Key Text
In the PuTTYgen window, copy the full key string at the top of the screen. You’ll paste this into your cPanel account in the next steps.
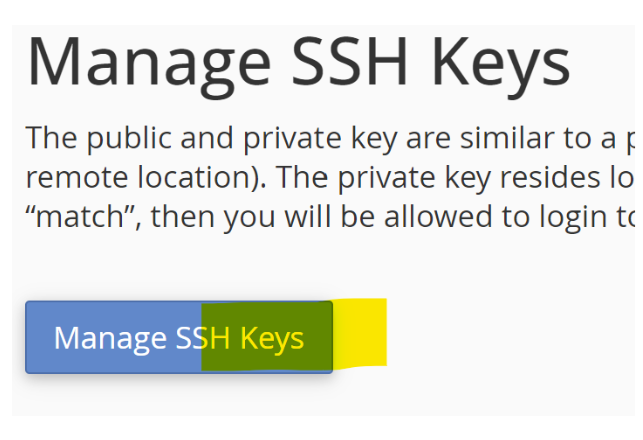
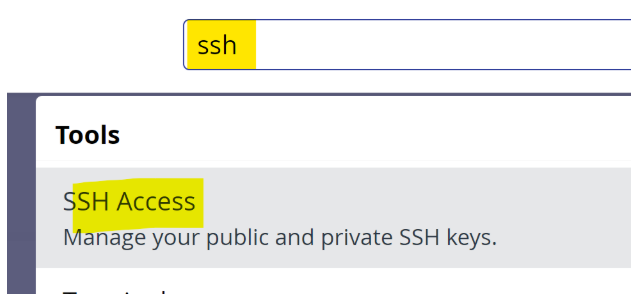
Step 5: Log In to cPanel and Open SSH Key Management
- Log in to your cPanel account.
- Use the search bar to type SSH.
- Click Manage SSH Keys.
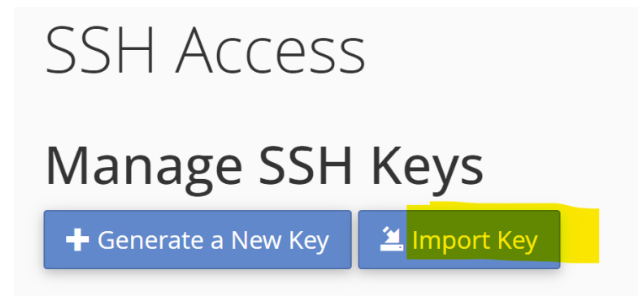
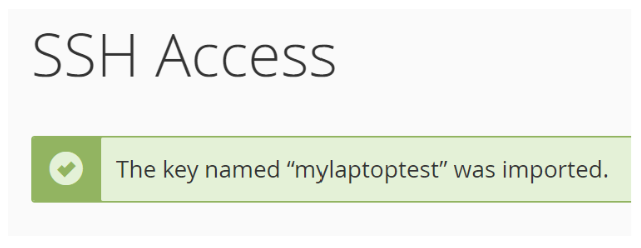
Step 6: Import the Public Key
- Click the Import Key button.
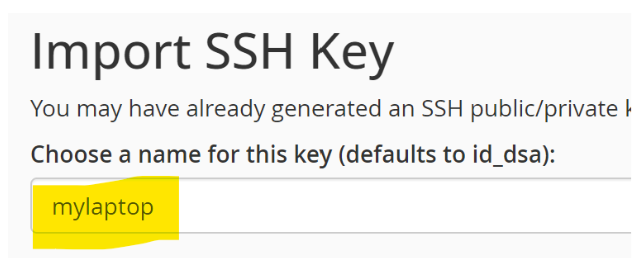
For the Key Name, you can leave it blank (it defaults to id_dsa), but it’s helpful to name it (e.g., mylaptop) if you plan to manage multiple keys.
- Paste the copied public key from PuTTYgen into the Public Key field only.
Leave the Private Key field empty.
Click Import.
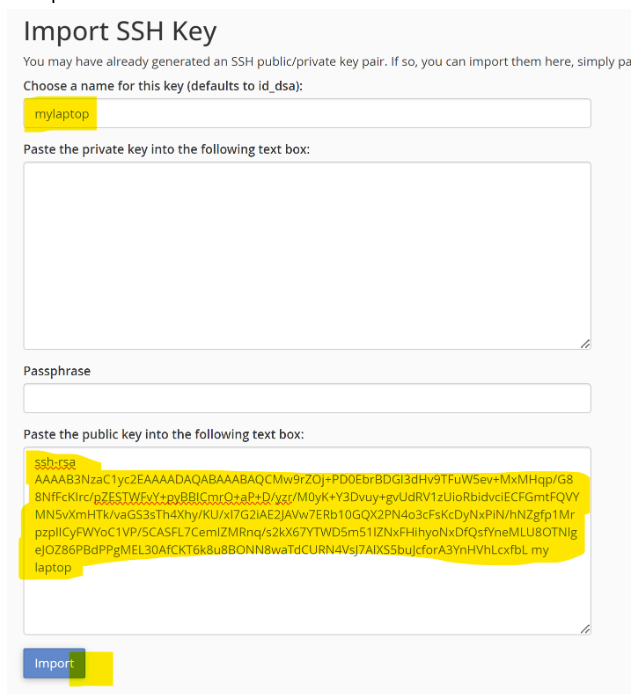
Note: If your browser autofills any login fields, clear them before hitting import.
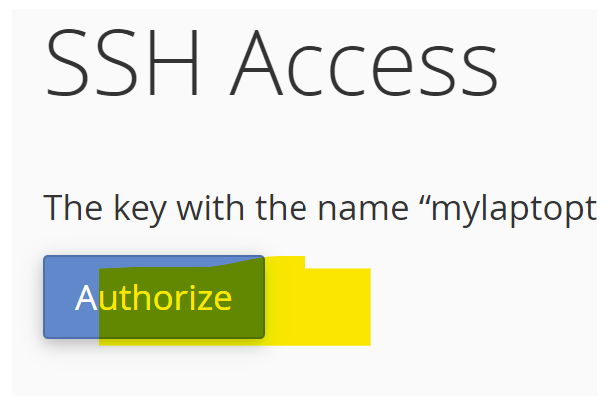
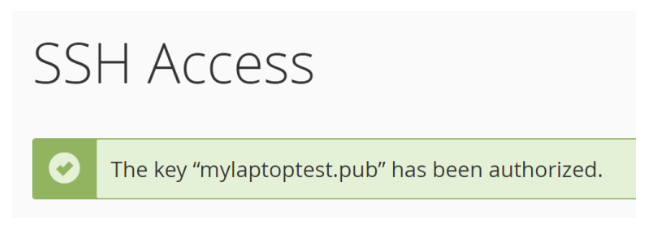
Step 7: Authorize the Imported Key
Once imported, return to the SSH Key list and find the one you just added.
Click Manage next to the key.
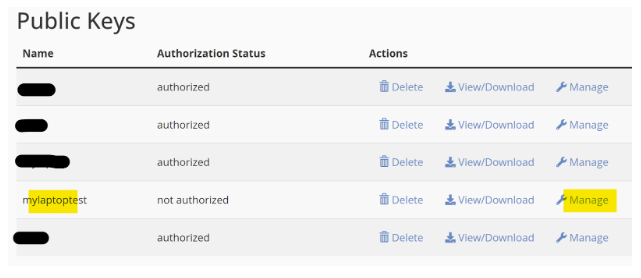
Then click Authorize.
Step 8: Configure FileZilla for SFTP Connection
Now that your key is uploaded and authorized, let’s set up FileZilla:
- Open FileZilla.
- Go to File > Site Manager.
- Click New Site and enter the following:
Protocol: SFTP – SSH File Transfer Protocol

- Host: Use the specific server your account is hosted on. You can find this in cPanel under
- Server Information or ask our support team (e.g., nodeXXX.vivinthost.com).
- Port: Use 37980. (Double-check with support if you're unsure about your server’s port.)
- Logon Type: Select Key file.
- User: Enter your cPanel username.
- Key File: Browse to the private key you saved earlier in Step 3.
- Click OK to save the connection settings.
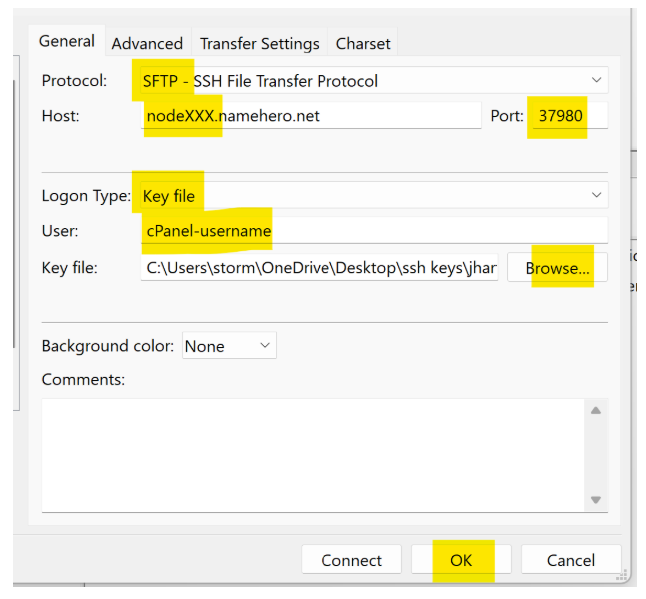
Don’t hit “Connect” right away-FileZilla won’t store the key file if you do. You must save first.
Need Help?
Vivint Host's expert support team is available around the clock to assist with any connection issues. Contact us through:
- Live chat in your client area
- Support ticket system
- Phone support during business hours
Remember: Proper SFTP/SSH setup ensures secure, reliable file transfers for your website.